5 Drawing Skills for Facilitators
Facilitators are not illustrators, nor do they need to be.
Still, basic drawing skills are an essential tool to be able to quickly draw models and create engaging and informative meeting visuals.
Picture this: You’re in a meeting, and your team members Barry and Samir cannot see eye to eye. One thinks the testing system should be fully automated using AI, while the other is against using AI in the process at all.
The conversation has been going in circles, each unwavering in their stance and seemingly unwilling to compromise.
A lightbulb hits.
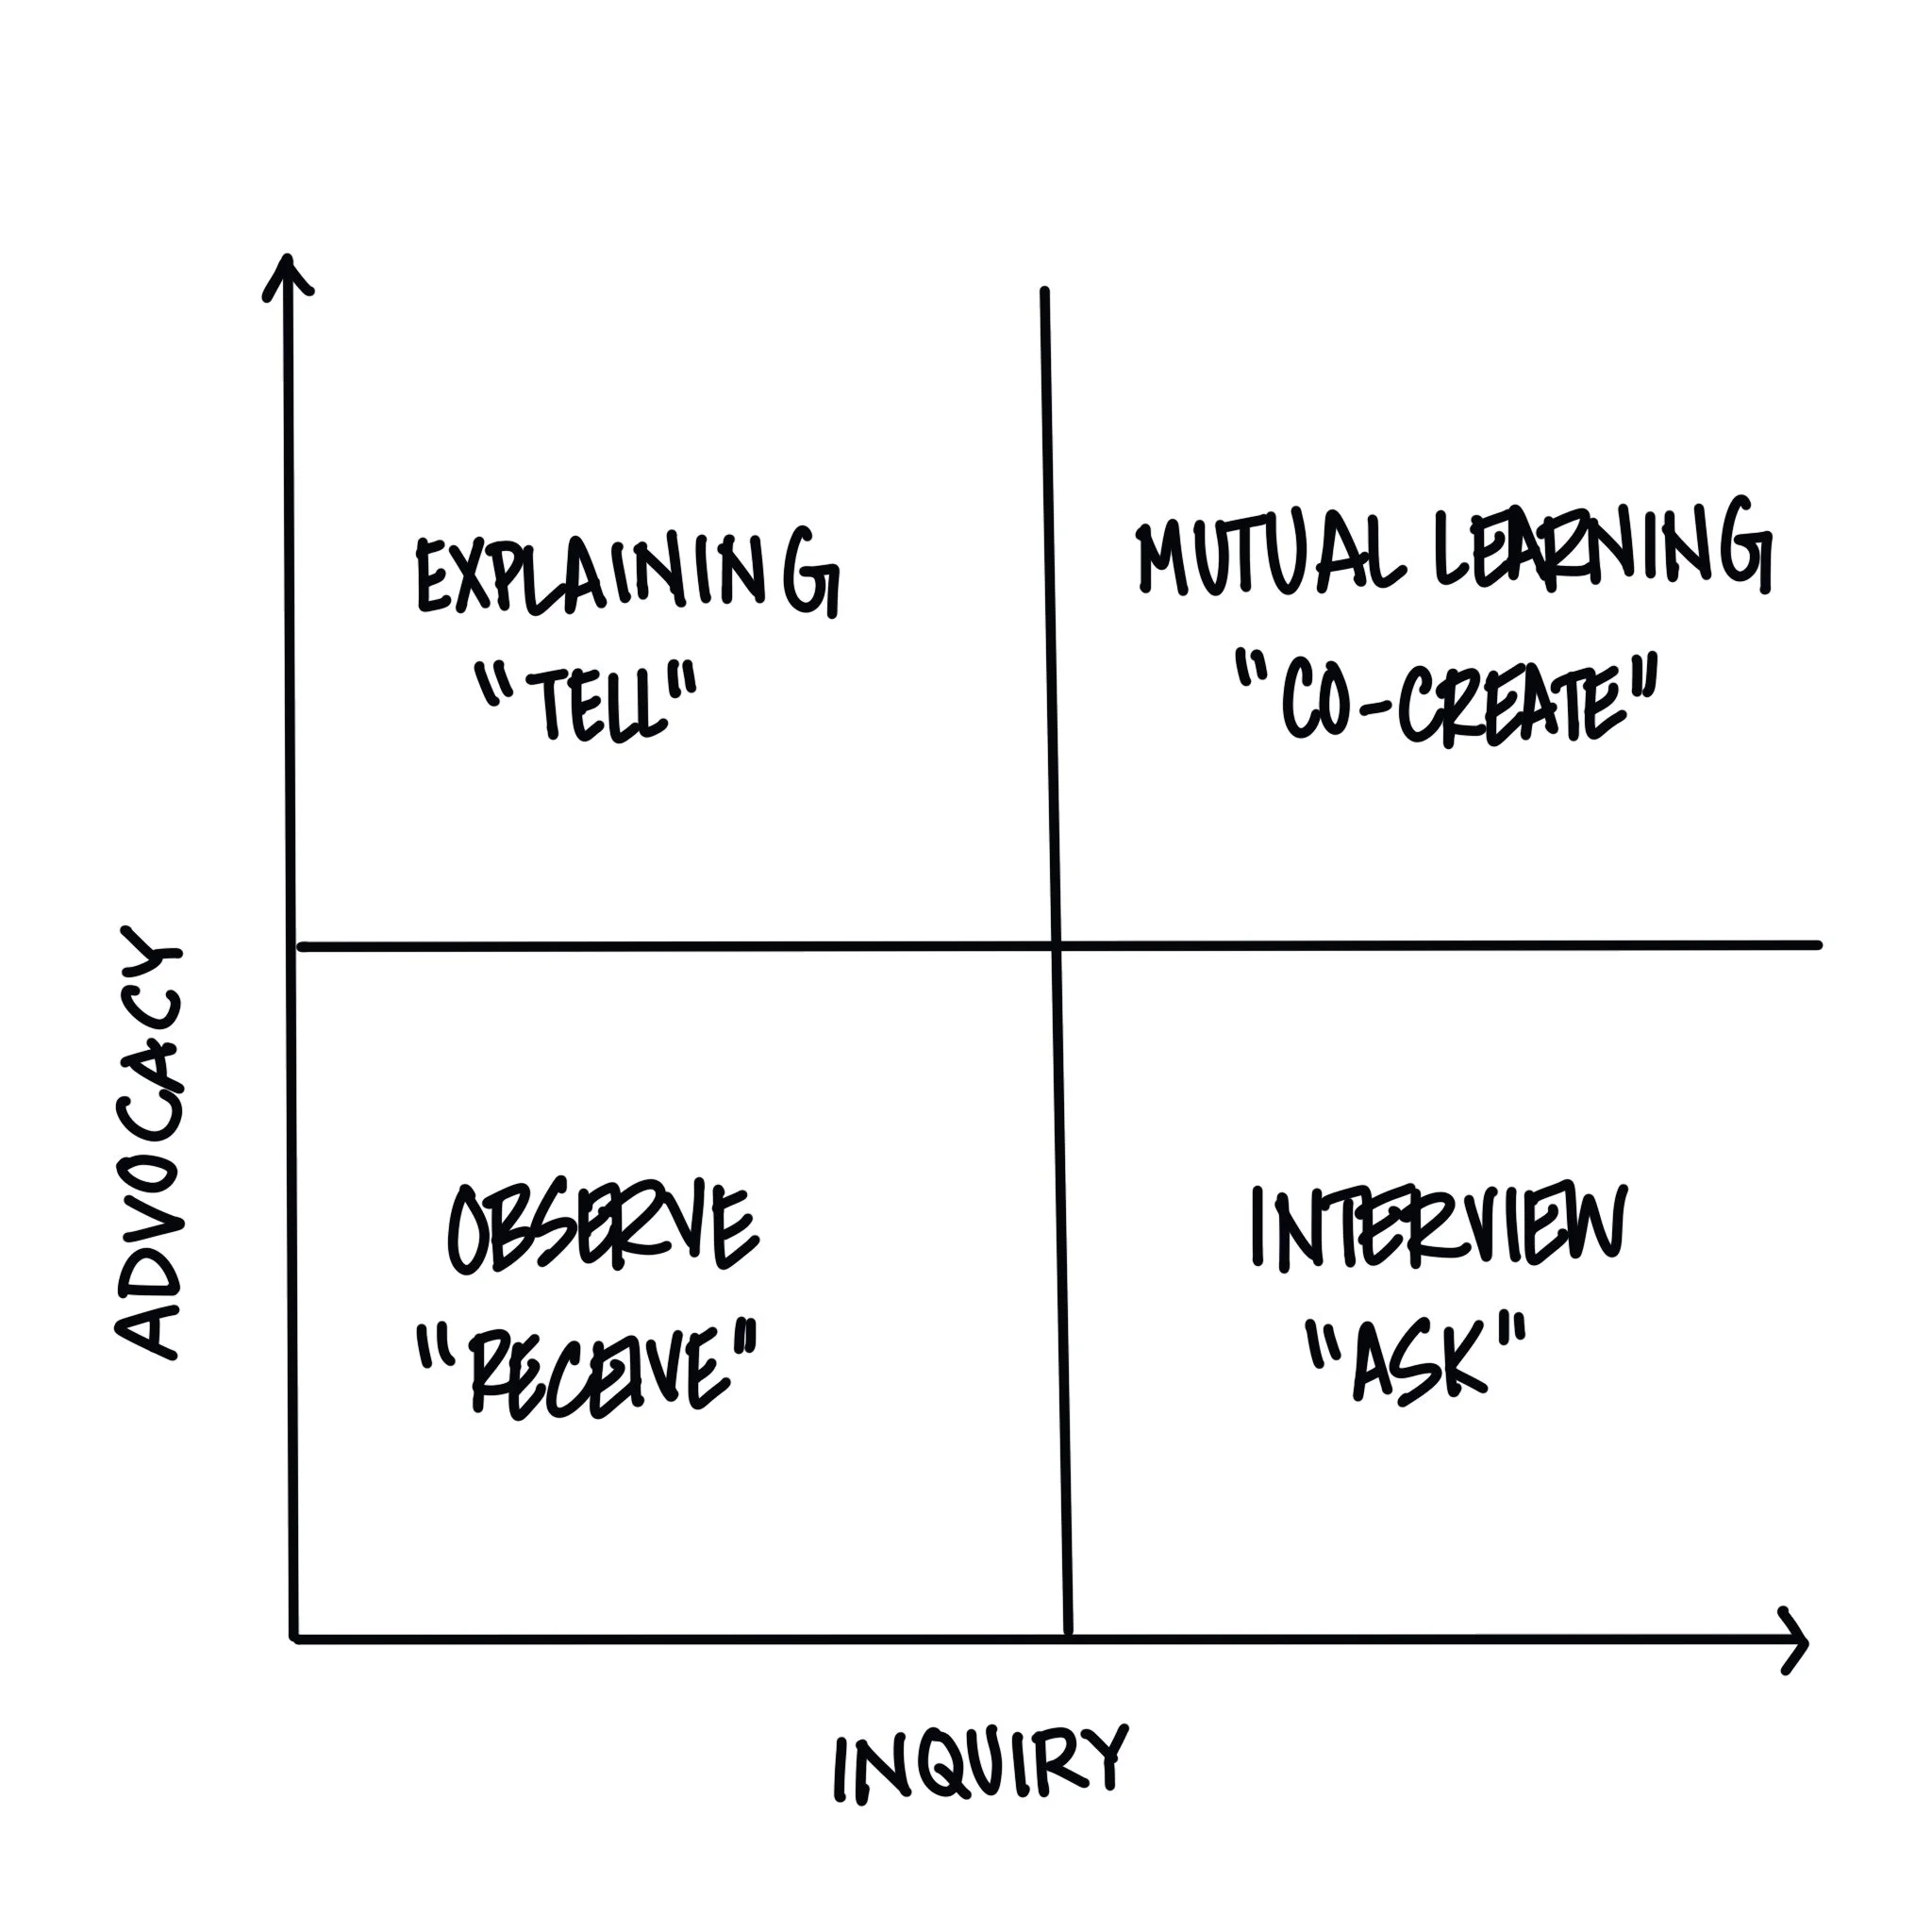
You grab your marker and a blank flip chart and draw two intersecting lines.
You label one axis “advocacy” and one “inquiry.” Then you explain that the right answer will only be found if each tries to understand the other's view.
With a visual illustration to look at, Barry and Samir take a step back and find a new willingness to co-create.
It only takes a few simple drawing skills to create models and communicate ideas visually. Here are the five elements every facilitator should have in their back pocket. Grab a flipchart and your favorite marker, and let’s practice!
Straight Lines
Once you can draw straight lines, you have everything you need to create better triangles and box shapes.
To draw a straight vertical line, hold your shoulder and elbow still as you bend your knees and “drop” down. Think “single leg lunge.” It’s easiest to create a straight line from top to bottom.
To draw a horizontal line, hold your shoulder and elbow still as you glide from side to side. Bend your knees and imagine a heavy book on your head so you keep your weight evenly distributed. It’s easiest to move toward your dominant hand (left to right for right-handed, and right to left for left-handed).
Circles
Even circle take practice.
Before putting your pen to paper, hold your arm in front of you with your elbow straight, and draw circles in the air. Without moving your wrist or elbow, use the natural motion of your shoulder joint to draw a circle.
For smaller circles, get closer to the chart and continue the shoulder movement with a bent elbow, still without moving your wrist.
Clockwise tends to be easier for right-handed drawers. Don’t go too slowly, as this will create bumps and less even curves.
With boxes, triangles, and circles put together, you can draw almost anything. Download the Dancing with Markers Icon Practice Pages to practice a few common icons.
Figures
The easiest way to upgrade your stick figures by using a box or an oval for the body instead of a simple line.
Add a circle on top for the head, leaving space where the neck would be (no need to add one; the viewer’s brain will fill in the rest).
Start arms from the corner of the box or toward the top of the oval to mirror a shoulder joint.
Download the Dancing with Markers Stick Figure Makeover for more tips and visual references.
Clouds
I put clouds around everything. They are perfect for a quick container or to section off content in your mind map.
Add variations to your clouds by varying the size of the curves (for example, two small bumps followed by one larger peak) and adding a flat bottom.
Arrows
Sometimes a line with a tip is all you need, but there are many more ways to direct the viewer’s eye or use an arrow as a container.
To draw a box arrow:
Start with a three-sided box.
On both of the unfinished ends, draw two short lines away from the box.
Add a dot a little way out from the box’s open side, an equal distance from both unfinished ends.
Connect the ends of the lines to the point to complete the arrow.
TRY THIS: Draw a Model (5 Mins)
Choose a model that you use all the time when you facilitate. One of my favorites is “Levels of Listening.”
Practice drawing the model in a notebook, on a piece of paper, or on a flipchart.
Add a figure to give your model a human touch. Perhaps include a talk bubble with a piece of information about the model.
Practice speaking to the key elements of the model as you draw.
Ready to keep drawing? Join the free Dancing with Markers Graphic Jam Challenge for six video lessons on basic drawing skills and three exercises to put your skills to use.